The Herringbone Single Crochet is easily one of my favorite stitches.
It’s a simple single crochet crochet stitch with one moderation: you insert your hook into the previous single crochet before starting on a new stitch.
I’ve seen the herringbone stitch done a couple different ways, but the way that I prefer gives off the most texture & uniform herringbone look row after row.
The first row, you’ll crochet the herringbone stitch.
In the second row, you’ll work the herringbone stitch in reverse.
Because the second row is worked in reverse, I’d say that the herringbone single crochet stitch is an advanced beginner stitch.
If you don’t know how to single crochet in reverse, don’t fret! It’s essentially the exact same way, but only backwards. And once you do it a few times, it will become second-nature.
I’ve included both a video and photo tutorial to help you learn the herringbone stitch!
How to crochet the single herringbone stitch
Step 1: First, start by chaining the desired length of your project. For this example, I chained 21.
Next, single crochet in the 2nd chain from the hook.
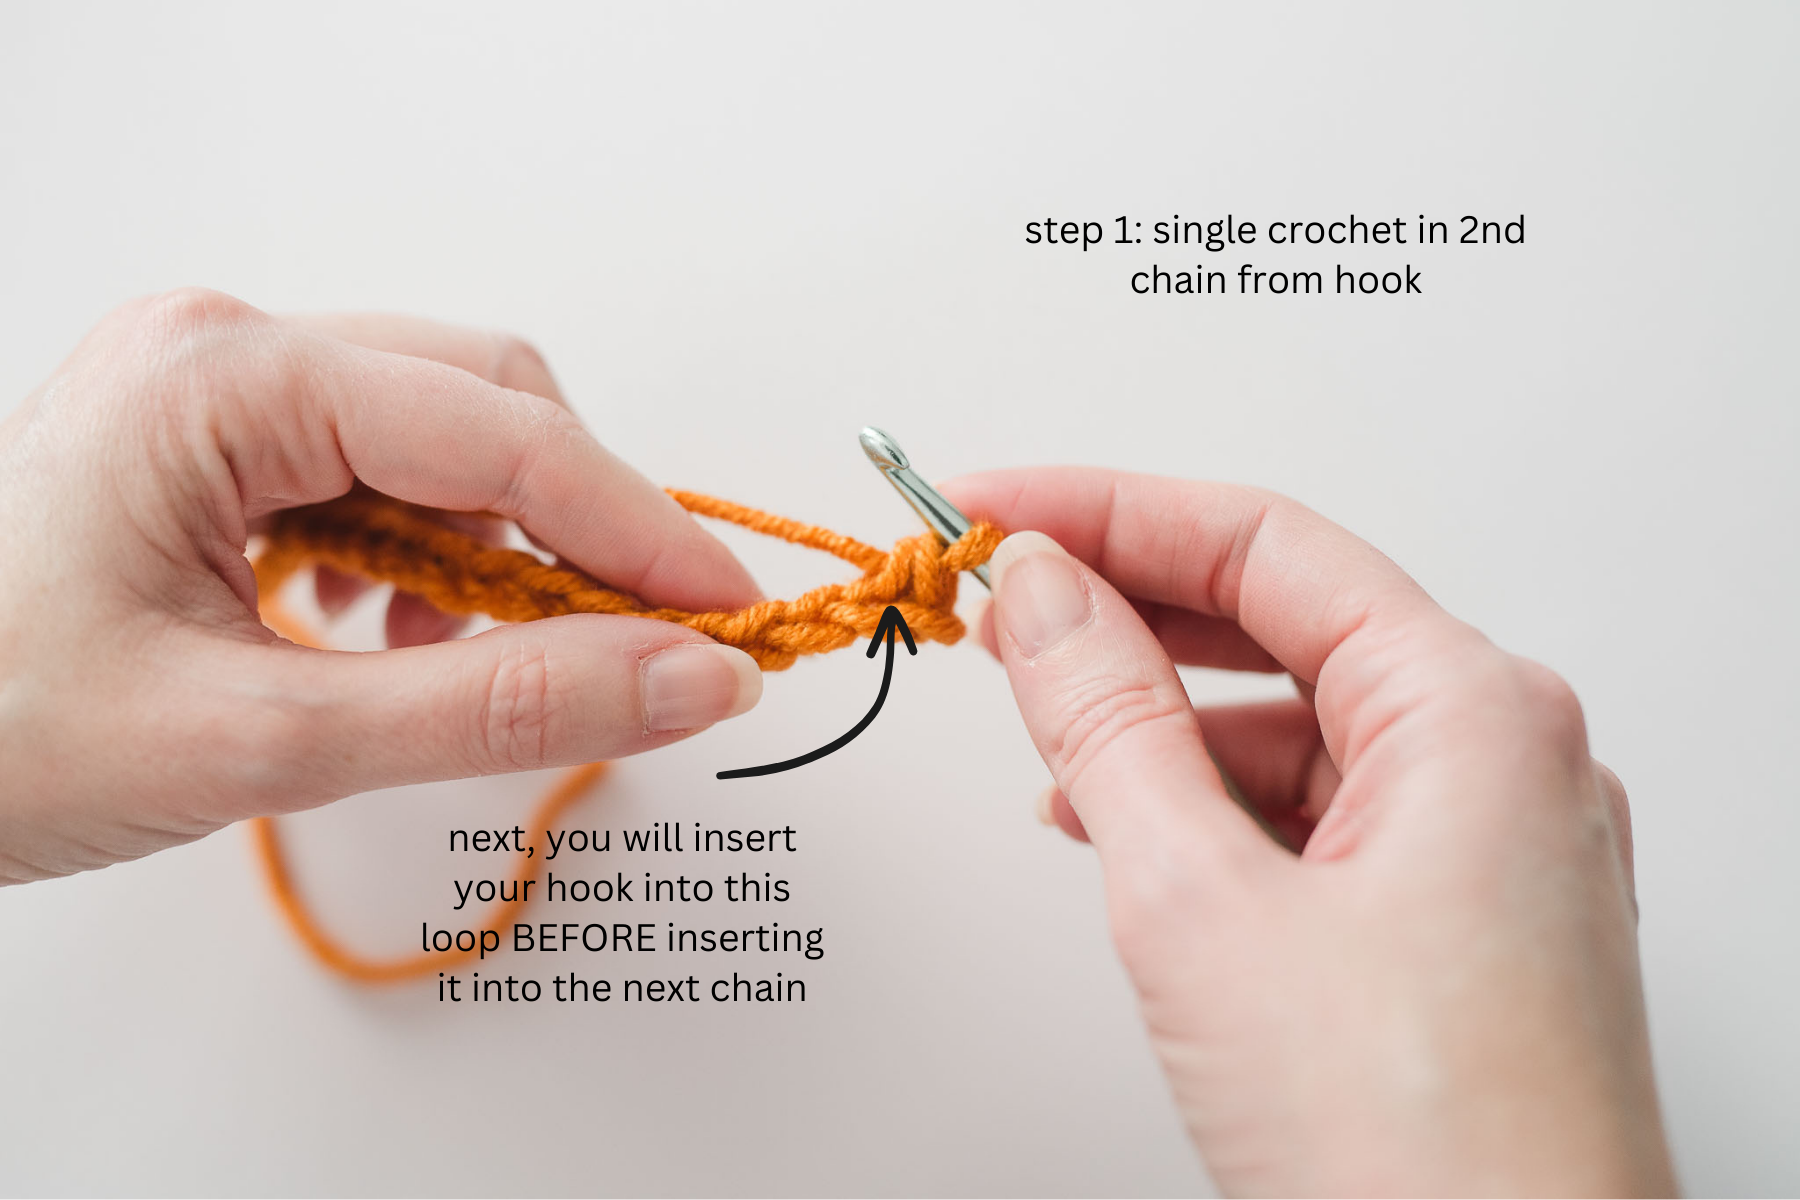
Step 2: insert your hook into the bottom loop of the single crochet you just made and then into the next chain ( 3 loops on hook)

Step 3: yarn over and pull through all 3 loops on the hook. Your first herringbone stitch is now complete!

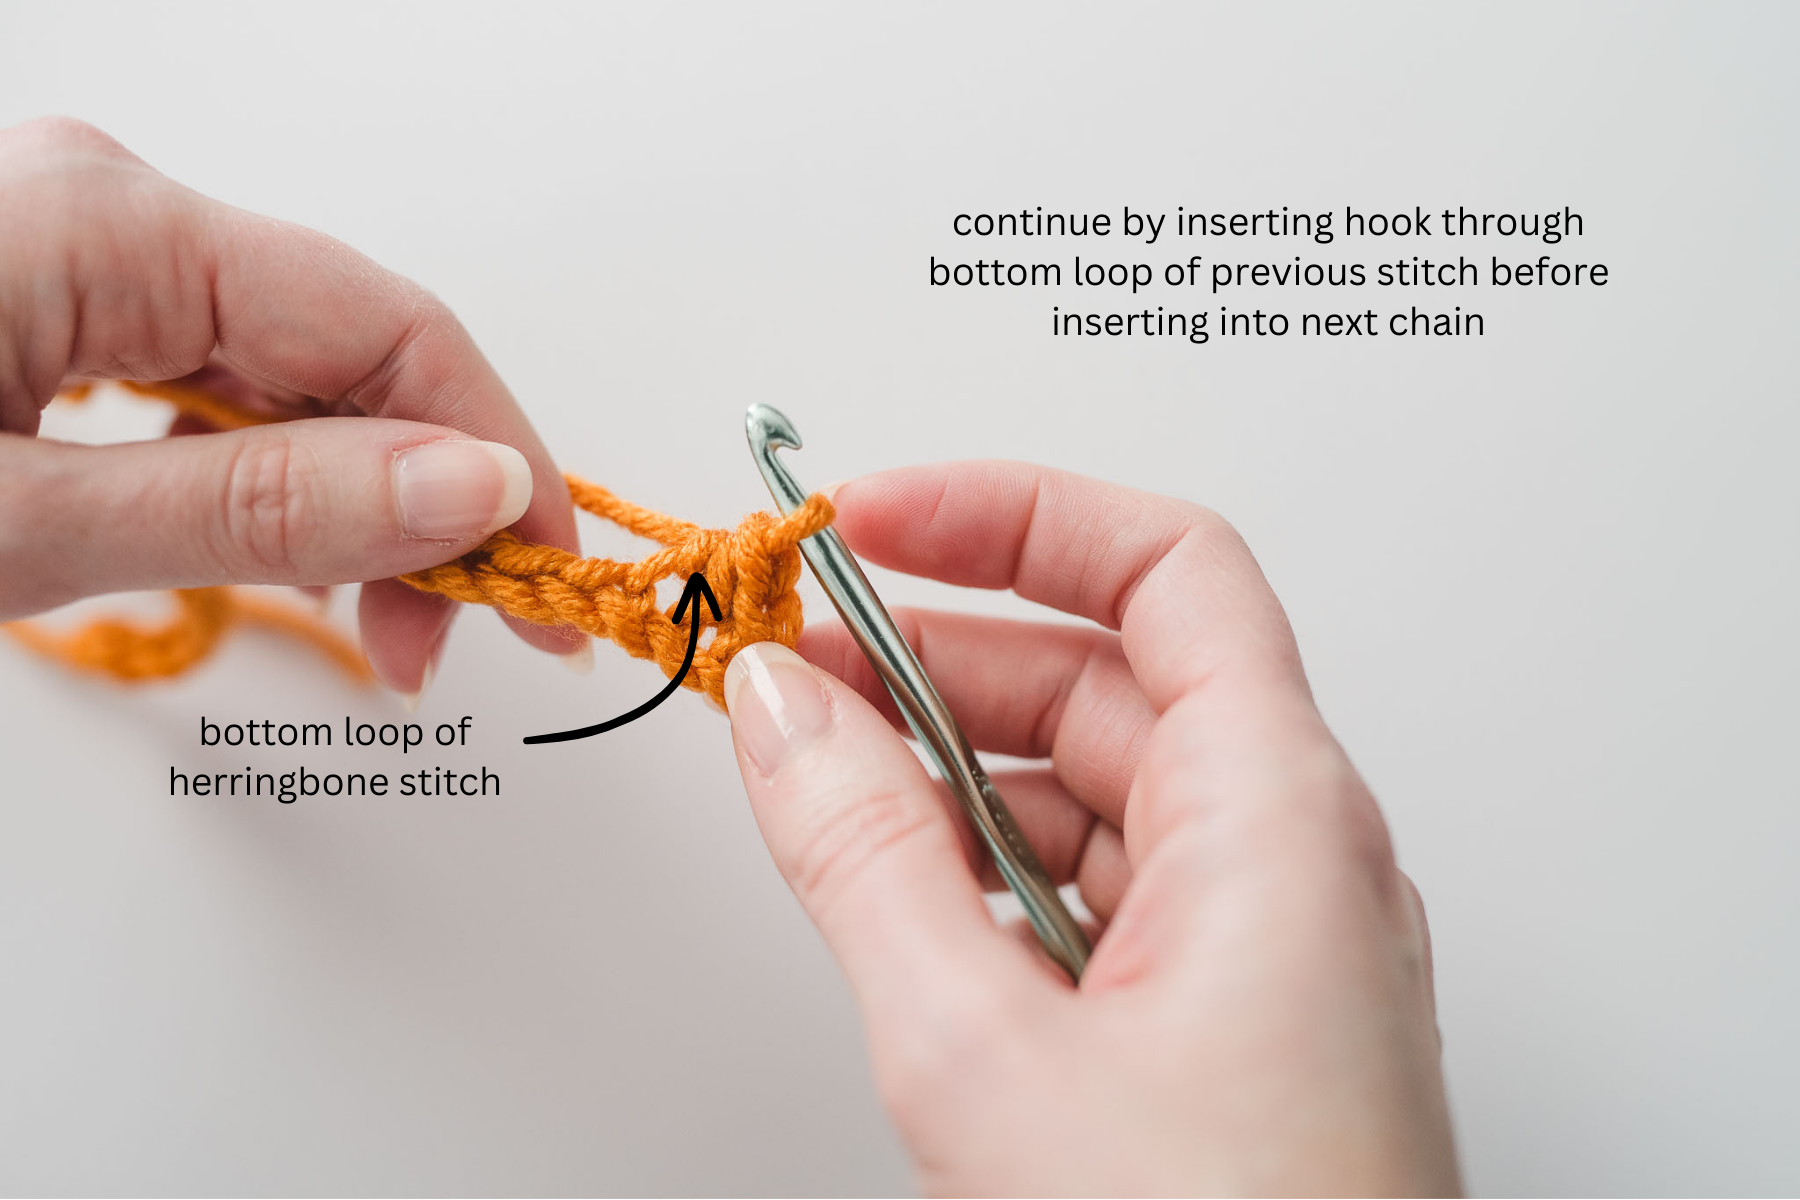
Step 4: continue to work the herringbone stitch my first inserting your hook through the bottom loop of the previous stitch and into the next chain. Yarn over and pull through all 3 loops on hook.
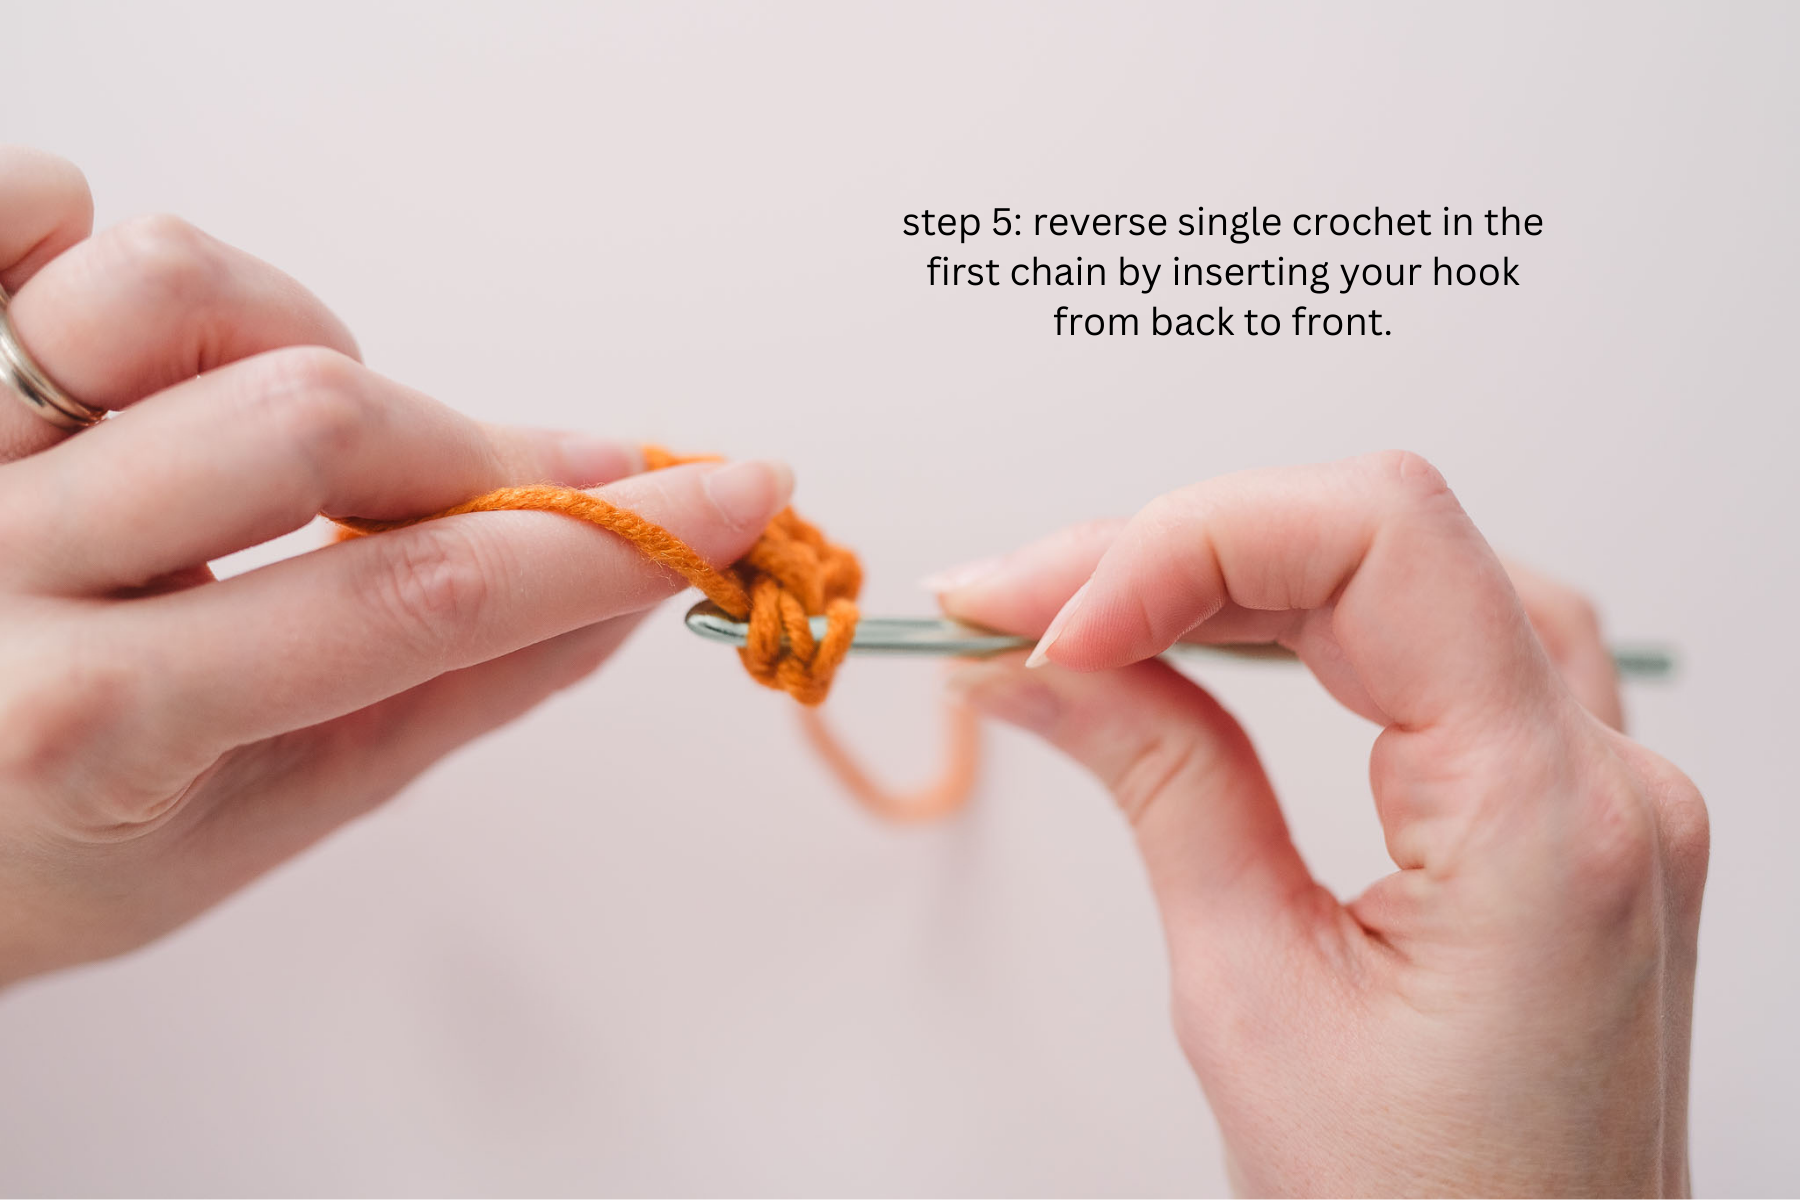
Step 5: Once you get to the end of your row, chain 1 and turn.
Next, reverse single crochet in the first stitch by inserting your hook from the back of the stitch to the front (as pictured)
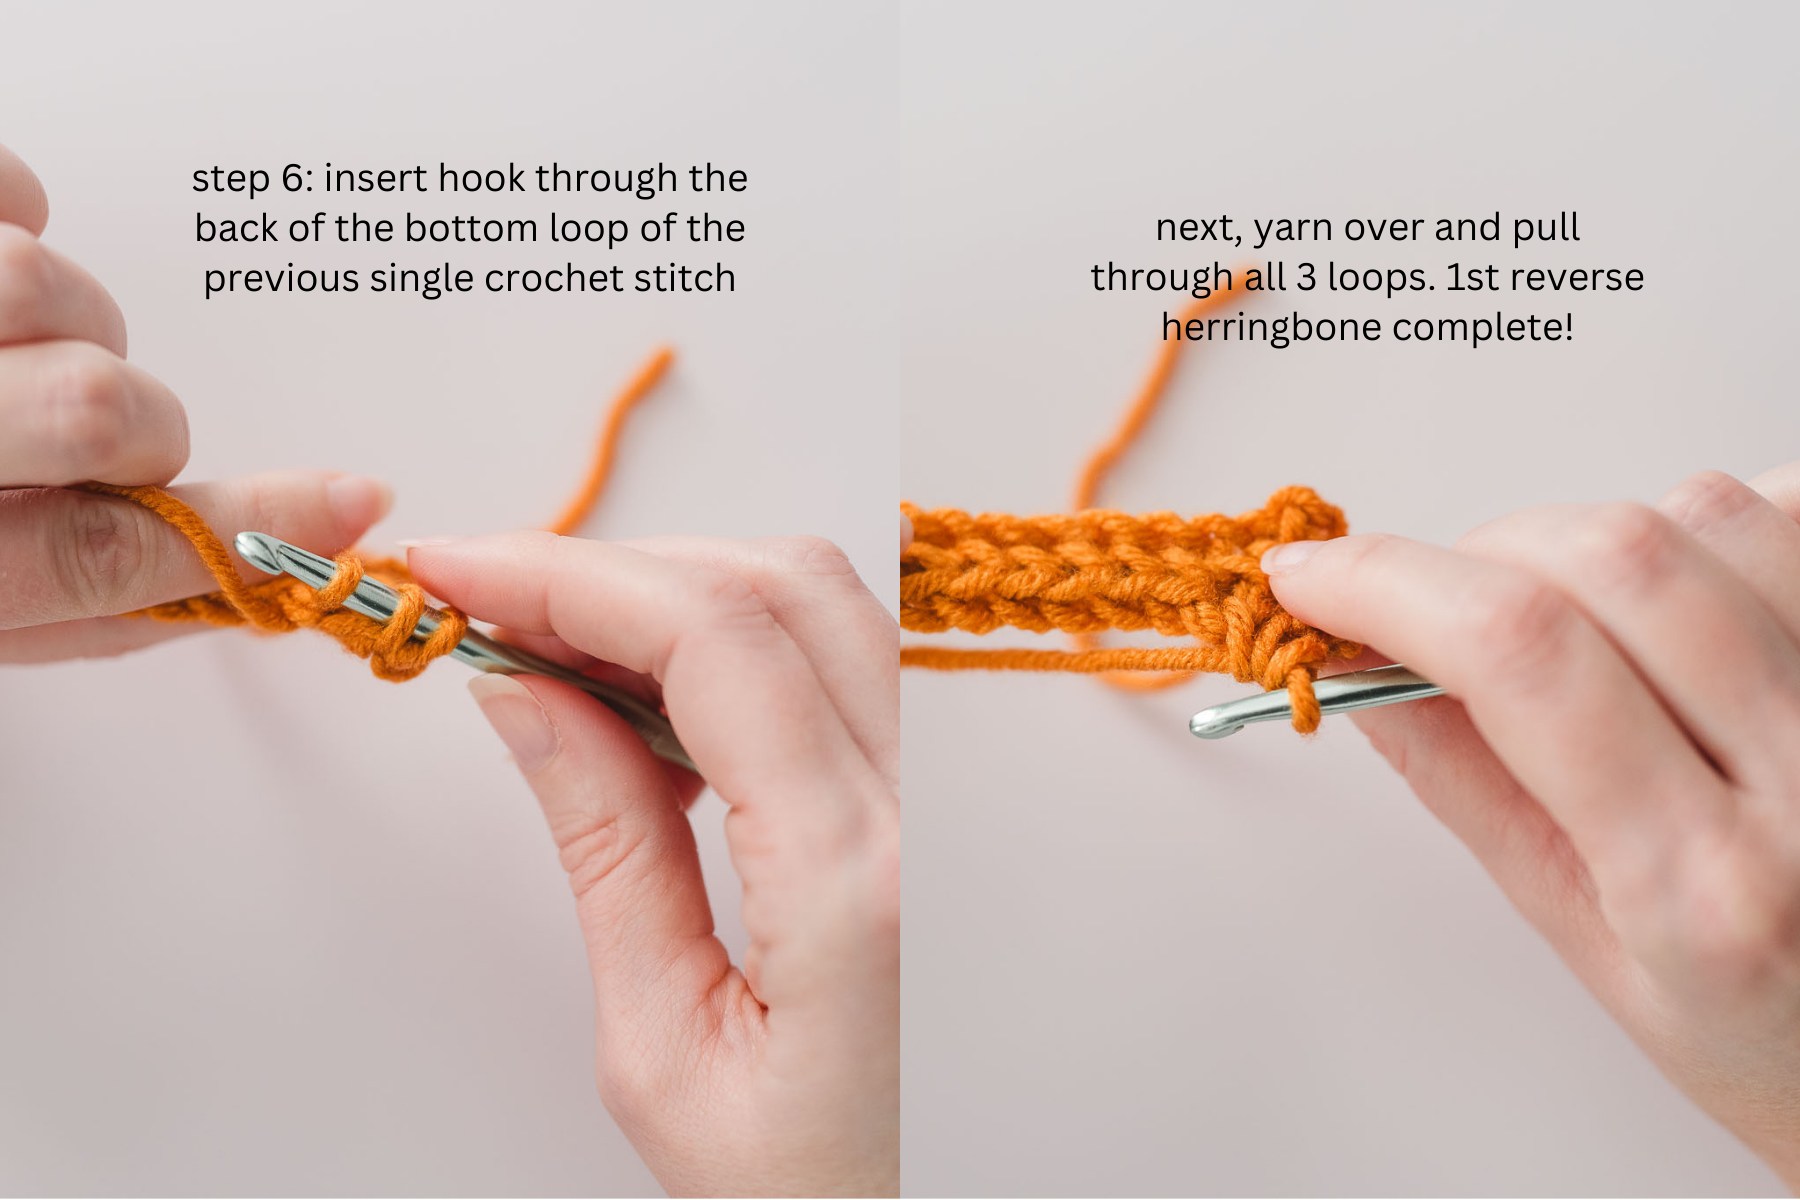
Step 6: reverse herringbone stitch by inserting hook through the back of the bottom loop of the previous single crochet and then into the next stitch (3 loops on hook). Pull through all 3 loops.
Continue to work the herringbone stitch in reverse through the end of the row.
Step 7: Chain 1, turn. Single crochet into first stitch, then herringbone stitch all the way across.
Continue to alternate between rows of herringbone stitch and reverse herringbone stitch for the desire number of rows.
That’s all there is to it!
Ready to try out this new stitch!? Make this beginner-friendly Herringbone hat with my free pattern.
And don’t forget to sign up for FREE weekly crochet patterns delivered straight to your inbox!